Crocheting is a delightful craft that allows you to create beautiful and functional items. As you work on larger projects, you’ll inevitably need to add new yarn. Knowing how to do this seamlessly ensures your creations remain sturdy and visually appealing. In this guide, we’ll walk you through various methods of adding yarn in crochet, helping you maintain consistency and quality in your work.
Why Adding Yarn Correctly Matters
Adding yarn isn’t just about tying a knot and continuing; it’s about ensuring the integrity and appearance of your project. Properly joining yarn:
- Maintains Consistency: Ensures the stitch pattern remains uniform.
- Enhances Durability: Prevents unraveling and strengthens the piece.
- Improves Aesthetics: Avoids unsightly knots and loose ends.
When to Add New Yarn
Understanding the optimal time to introduce new yarn can make a significant difference:
- Mid-Row vs. End of Row: While adding at the end of a row is less noticeable, sometimes yarn runs out mid-row. Both situations are common, and we’ll address techniques for each.
- Color Changes: When incorporating a new color, adding yarn at strategic points can enhance the design.
Methods for Adding Yarn in Crochet
1. The Traditional Knot Method
This is a straightforward technique suitable for beginners.
Steps:
- Prepare the New Yarn: Create a slip knot on the new yarn.
- Attach to the Hook: Place the slip knot on your crochet hook.
- Continue Crocheting: Insert the hook into the next stitch, yarn over with the new yarn, and pull through.
- Secure the Tail: Crochet over the tail ends for a few stitches to secure them.
Pros:
- Simple and quick.
- Requires no additional tools.
Cons:
- The knot may be slightly visible.
- Less secure than other methods.
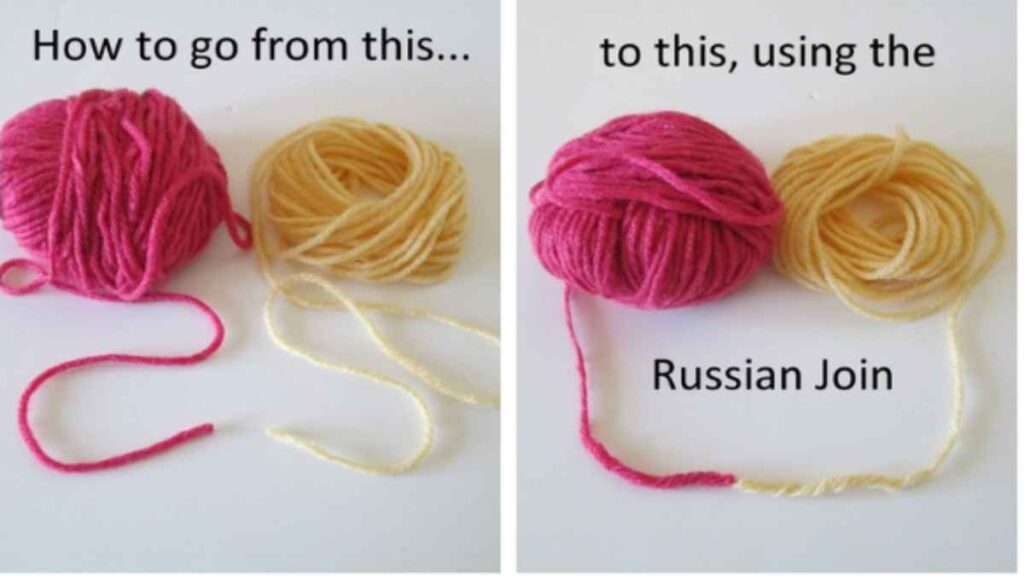
2. The Russian Join
A favorite among seasoned crocheters, the Russian Join creates a seamless connection without knots.
Steps:
- Thread the Yarn: Use a yarn needle to thread the tail of the old yarn.
- Weave Back Into Itself: Insert the needle back into the yarn, creating a loop.
- Insert New Yarn: Thread the new yarn through the loop.
- Weave New Yarn: Weave the tail of the new yarn back into itself.
- Trim Excess: Cut any remaining tails.
Pros:
- Creates a smooth, knot-free join.
- Ideal for color changes.
Cons:
- Slightly time-consuming.
- Requires a yarn needle.
3. The Magic Knot (Double Knot) Method
This method ensures a strong join, especially useful for projects that will undergo stress.
Steps:
- Overlap Yarns: Lay the old and new yarns parallel, overlapping.
- Tie Knots: Tie the tail of the old yarn around the new yarn and vice versa.
- Pull Tight: Slide the knots together and pull tight.
- Trim Closely: Cut the tails close to the knots.
Pros:
- Extremely secure.
- Quick to execute.
Cons:
- The knot can be slightly bulky.
- May be visible in lighter-weight yarns.
4. The Spit Splice (Felting) Method
Best suited for natural animal fibers, this method felts the yarn ends together.
Steps:
- Fray the Ends: Unravel and fluff the ends of both yarns.
- Moisten the Ends: Slightly dampen the frayed ends.
- Overlap and Rub: Place the ends together and rub between your palms to felt them.
Pros:
- Creates an invisible join.
- No ends to weave in.
Cons:
- Only works with feltable fibers.
- Moistening may be uncomfortable for some.
Tips for a Smooth Yarn Transition
- Maintain Tension: Keep consistent tension to avoid loose stitches.
- Weave in Ends: Always weave in ends securely to prevent unraveling.
- Practice Different Methods: Experiment to find the technique that works best for you.
Common Mistakes to Avoid
- Visible Knots: Ensure knots are tight and trimmed closely.
- Inconsistent Tension: Practice maintaining even tension during joins.
- Ignoring Fiber Content: Some methods aren’t suitable for all yarn types.
Conclusion
Mastering the art of adding yarn in crochet enhances the quality and longevity of your projects. By practicing these methods, you’ll find the one that best suits your style and project needs. Happy crocheting!
Frequently Asked Questions
Q1: Can I use the Russian Join with all types of yarn?
A1: The Russian Join works best with plied yarns. It may be challenging with slippery or single-ply yarns.
Q2: Will the Magic Knot show in my finished project?
A2: The Magic Knot can be slightly visible, especially in lightweight or smooth yarns. Consider the project’s purpose and yarn type when choosing this method.
Q3: How do I add yarn when changing colors?
A3: When changing colors, introduce the new yarn at the end of a row or round for a cleaner transition. Secure and weave in ends properly.
Q4: Is the Spit Splice method hygienic?
A4: While traditional, some prefer using water instead of saliva for moistening the yarn ends.
Q5: What should I do if my join creates a bump?
A5: Ensure you’re not tying knots too tightly. Practice different methods to find the smoothest result.
Q6: How can I secure yarn ends effectively?
A6: Weaving in ends in multiple directions can help secure them. Some crocheters also use a small amount of fabric glue for added security.
Q7: Can I add new yarn in the middle of a project?
A7: Yes, you can add new yarn mid-project. Choose a joining method that suits your yarn type and project to ensure a seamless transition.
Q8: What’s the best method for joining yarn in amigurumi?
A8: For amigurumi, the Russian Join or Spit Splice are preferred to avoid knots that might show on the tight stitches.
Q9: How do I prevent my joins from coming undone?
A9: Ensure all ends are securely woven in, and consider using a dab of fabric glue for extra security.
Q10: Can I use these methods for both crochet and knitting?
A10: Absolutely! These joining techniques are applicable to both crafts and help in creating seamless projects.

